Installing a three-phase mechanical meter box in a factory building is a crucial task that requires careful planning, proper knowledge, and adherence to safety regulations. As a supplier of Three Phase Mechanical Meter Boxes, I have witnessed firsthand the importance of a well-executed installation process. In this blog post, I will guide you through the step-by-step process of installing a three-phase mechanical meter box in a factory building, ensuring a safe and efficient electrical metering system.
Step 1: Planning and Preparation
Before you begin the installation process, it is essential to conduct a thorough assessment of the factory building's electrical requirements. This includes determining the appropriate location for the meter box, ensuring it is easily accessible for maintenance and reading, and is in compliance with local electrical codes and regulations.
- Location Selection: Choose a location that is dry, well-ventilated, and away from any potential sources of damage or interference. The meter box should be installed at a convenient height for easy reading and maintenance, typically between 1.5 and 2 meters above the ground.
- Electrical Load Calculation: Calculate the total electrical load of the factory building to determine the appropriate size and capacity of the three-phase mechanical meter box. This will ensure that the meter box can accurately measure the electricity consumption and prevent overloading.
- Safety Precautions: Familiarize yourself with all relevant safety regulations and guidelines before starting the installation. This includes wearing appropriate personal protective equipment (PPE), such as gloves and safety glasses, and ensuring that all electrical connections are properly insulated.
Step 2: Gather the Necessary Tools and Materials
Once you have completed the planning and preparation phase, it's time to gather all the necessary tools and materials for the installation. Here is a list of items you will need:
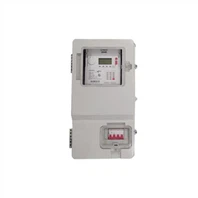
- Three Phase Mechanical Meter Box: Three Phase Mechanical Meter Box Ensure that the meter box is compatible with the electrical system of the factory building and meets all relevant standards and specifications.
- Electrical Wires and Cables: Select the appropriate gauge and type of electrical wires and cables based on the electrical load and distance between the meter box and the electrical panel.
- Mounting Brackets and Hardware: Use sturdy mounting brackets and hardware to securely attach the meter box to the wall or other supporting structure.
- Screwdrivers, Pliers, and Wire Cutters: These basic hand tools will be used for installing the meter box, connecting the electrical wires, and making any necessary adjustments.
- Voltage Tester: A voltage tester is essential for ensuring that the electrical circuit is de-energized before making any connections or performing maintenance.
Step 3: Install the Mounting Brackets
The next step is to install the mounting brackets for the three-phase mechanical meter box. Follow these steps:
- Mark the Mounting Locations: Use a level and a measuring tape to mark the exact locations where the mounting brackets will be installed on the wall. Ensure that the marks are straight and evenly spaced.
- Drill the Holes: Use a drill to create holes in the wall at the marked locations. The size of the holes should be slightly larger than the diameter of the mounting bolts.
- Insert the Wall Anchors: Insert wall anchors into the drilled holes to provide additional support and stability for the mounting brackets.
- Attach the Mounting Brackets: Use screws or bolts to attach the mounting brackets to the wall, ensuring that they are securely fastened.
Step 4: Install the Three Phase Mechanical Meter Box
Once the mounting brackets are installed, it's time to install the three-phase mechanical meter box. Follow these steps:
- Lift the Meter Box: Carefully lift the meter box and place it onto the mounting brackets. Ensure that the meter box is level and aligned with the brackets.
- Secure the Meter Box: Use screws or bolts to secure the meter box to the mounting brackets, ensuring that it is firmly attached.
- Connect the Electrical Wires: Connect the electrical wires from the factory building's electrical panel to the appropriate terminals on the meter box. Follow the wiring diagram provided with the meter box to ensure correct connections.
- Test the Connections: Use a voltage tester to test the electrical connections and ensure that there are no loose or faulty connections.
Step 5: Install the Three Phase Keypad Meter Box (Optional)
If you require additional functionality or features, you may consider installing a Three Phase Keypad Meter Box. This type of meter box allows for easy programming and monitoring of the electricity consumption. Follow these steps to install the keypad meter box:
- Mount the Keypad Meter Box: Mount the keypad meter box near the three-phase mechanical meter box, ensuring that it is easily accessible.
- Connect the Wires: Connect the wires from the keypad meter box to the appropriate terminals on the three-phase mechanical meter box. Follow the wiring diagram provided with the keypad meter box for correct connections.
- Program the Keypad Meter Box: Follow the manufacturer's instructions to program the keypad meter box with the desired settings and parameters.
Step 6: Install the Indoor Outdoor Electrical Panel Box (Optional)
In some cases, you may need to install an Indoor Outdoor Electrical Panel Box to protect the electrical components and connections from the elements. Follow these steps to install the electrical panel box:


- Select the Location: Choose a suitable location for the electrical panel box, ensuring that it is protected from rain, snow, and other environmental factors.
- Mount the Electrical Panel Box: Mount the electrical panel box on a wall or other supporting structure using the provided mounting brackets and hardware.
- Connect the Wires: Connect the wires from the three-phase mechanical meter box and other electrical components to the appropriate terminals on the electrical panel box. Follow the wiring diagram provided with the electrical panel box for correct connections.
Step 7: Final Checks and Testing
Once the installation is complete, it's important to perform a final check and testing to ensure that everything is working properly. Follow these steps:
- Inspect the Installation: Carefully inspect the installation to ensure that all connections are secure, all wires are properly insulated, and there are no signs of damage or wear.
- Test the Meter Box: Use a calibrated meter or other testing equipment to verify that the three-phase mechanical meter box is accurately measuring the electricity consumption.
- Test the Electrical System: Turn on the power to the factory building and test the electrical system to ensure that all electrical equipment and appliances are functioning properly.
Conclusion
Installing a three-phase mechanical meter box in a factory building is a complex but essential task that requires careful planning, proper knowledge, and adherence to safety regulations. By following the steps outlined in this blog post, you can ensure a safe and efficient installation process. If you have any questions or need further assistance with the installation of a three-phase mechanical meter box, please do not hesitate to contact us. We are a leading supplier of high-quality Three Phase Mechanical Meter Boxes and can provide you with the expertise and support you need. Let's discuss your specific requirements and explore how we can meet your needs.
References
- Electrical Installation Regulations, National Electrical Code (NEC)
- Manufacturer's Installation Manuals for Three Phase Mechanical Meter Boxes, Three Phase Keypad Meter Boxes, and Indoor Outdoor Electrical Panel Boxes